1. Focus the ticket queue
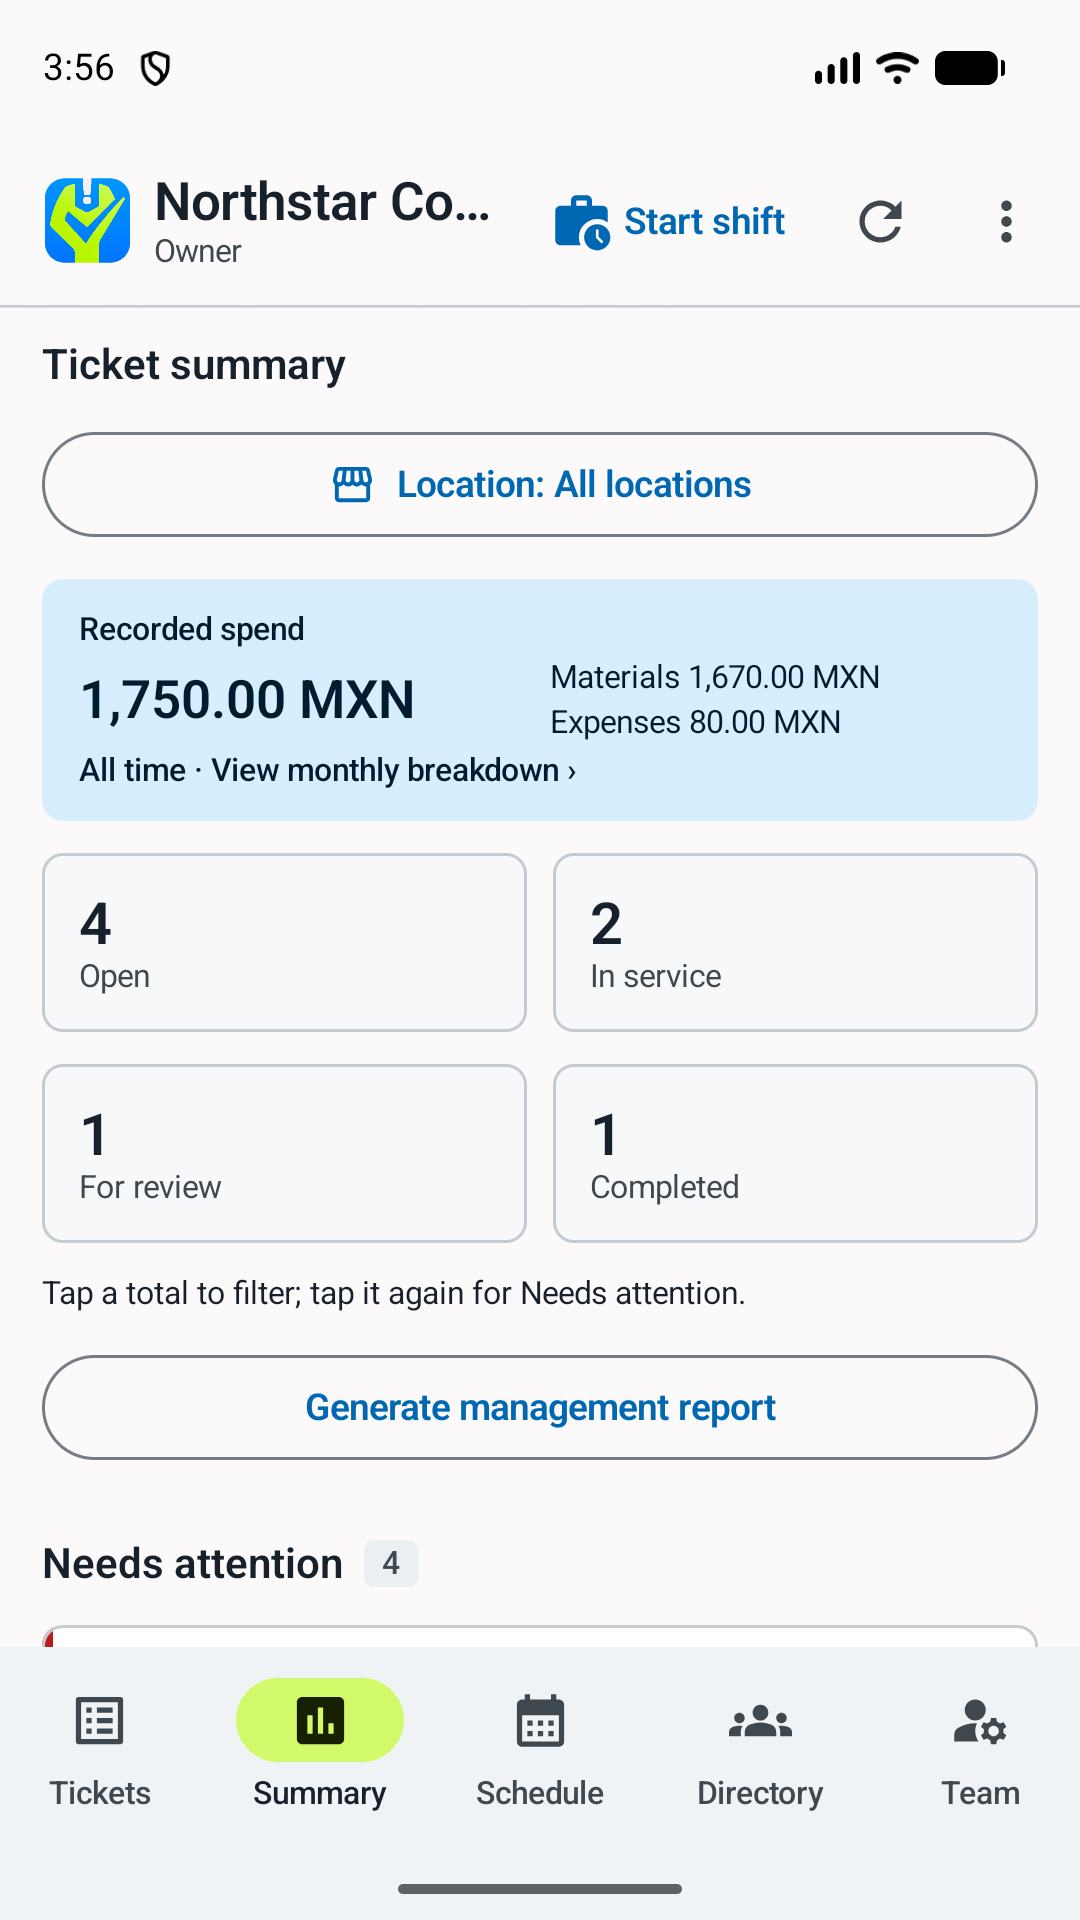
- Open Summary. With no total selected, the list shows Needs attention.
- Tap Open, In service, For review, or Completed to show that ticket group. The selected total is highlighted.
- Tap the highlighted total again to return to Needs attention.
- Open the location selector and choose one location. Counts, recorded spend, and the ticket list update to the same location scope.
- Choose All locations to clear the location filter.
Important: these totals overlap. Open includes every non-completed ticket, including tickets that are also In service or For review. Do not add all four totals as if they were separate populations. A dashboard filter changes only the view; it does not change status, assignment, or responsibility.
2. Trace recorded spend
- Tap Recorded spend.
- Review the selected month, recorded total, materials/expenses split, and the comparison with the prior month.
- Use the month controls to move backward or forward.
- Switch between Months and Entries.
- Tap an entry to open the source ticket and verify its operational context.
The Summary total is all-time retained recorded spend for the selected location. The monthly sheet is calendar-month detail. A management report uses its chosen date period. Keep these three scopes distinct.
Recorded spend is operational evidence, not an accounting statement. Currencies remain separate. Supplied or unpriced material is not presented as a purchase. Pending offline entries are separate from acknowledged totals; rejected events and removed tickets are excluded.
3. Generate a management report
- Return to Summary and choose the intended location or All locations.
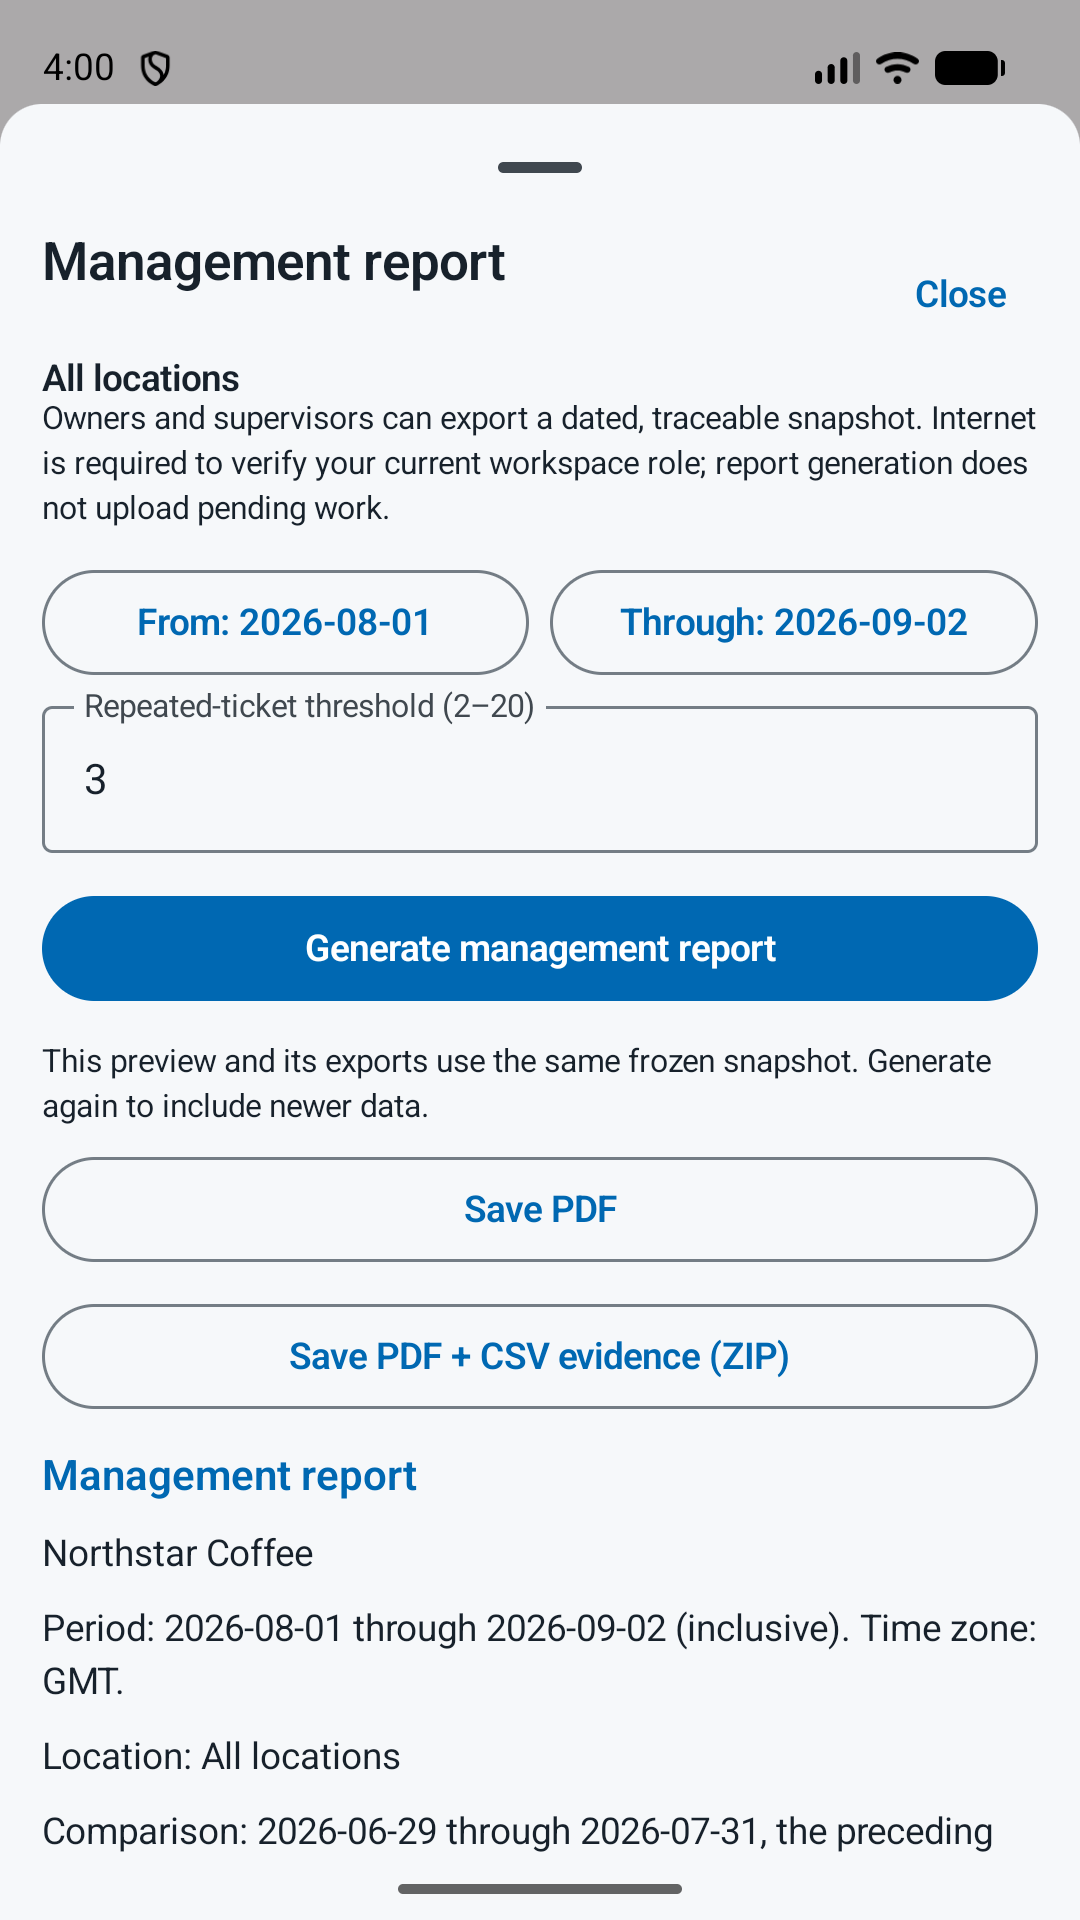
- Tap Generate management report.
- Choose inclusive From and Through dates. The period can contain 1-366 days and cannot end in the future.
- Set the repeated-ticket threshold from 2-20. The default is 3.
- Tap Generate management report inside the sheet and wait for the preview.
- Review activity/backlog, recorded spend, elapsed response/resolution/review times, repeated equipment, diagnostic outcomes, data coverage, and definitions.
- Use Save PDF for the readable report or Save PDF + CSV evidence (ZIP) for the report and source rows. Save only to an authorized destination.
The location selector scopes the report; a selected status total does not. The preview and its exports use one frozen snapshot. Generate again after syncing or when dates, threshold, or location must change.
The evidence ZIP contains:
report.pdf— readable summary, limitations, and definitions;tickets.csv— ticket identity, scope, links, and cutoff state;expenses.csv— cost rows and originating ticket/event IDs;timings.csv— measurable intervals and source event IDs;repeat_equipment.csv— qualifying equipment and constituent tickets;diagnostics.csv— structured submissions and management decisions;events.csv— source event metadata, not attachments or raw payloads;manifest.json— report metadata and SHA-256 hashes.
Hashes can reveal a changed exported copy. They are not a server signature, financial audit, or independent certification.
4. Read the signals honestly
- Mean, median, and sample size describe elapsed calendar time for measurable records. They do not measure technician labor, downtime, or MTTR.
- Resolution time includes waiting, pauses, and return visits.
- Repeated equipment means distinct reactive tickets linked to the same equipment ID met the selected threshold. Similar titles are not treated as the same asset.
- A repeat flag identifies an asset worth investigating. It does not prove failure, causation, replacement need, or employee performance.
- Backlog is reconstructed at the selected cutoff. Low samples, missing equipment links, exclusions, and incomplete local coverage stay visible instead of being guessed.
5. Keep a diagnostic in the ticket
Use a diagnostic when the team needs evidence before repair can continue—for example, to decide whether an asset is repairable, safe to operate, or safe to move.
- An operational team member selects Request diagnostic and records the question or test scope. This does not advance the ticket.
- The assigned technician works from Work in progress, selects Submit diagnostic for review, and records summary, tests performed, findings, conclusion, operability, and recommended action.
- After synchronization, the ticket enters Diagnostic review.
- An owner or supervisor reviews the evidence and records a disposition: continue repair, continue testing, pause, route to a specialist, plan replacement, close without repair, or close because no fault was found.
- The timeline preserves the submission, reviewer, rationale, and resulting route. The next report includes the outcome and its evidence references.
Only the latest synchronized diagnostic can be dispositioned. A pending local submission must sync first. Closing from diagnostic review does not claim that a repair occurred.
6. If something does not look right
- No report button: confirm the selected workspace and an owner/supervisor role.
- Empty report or month: check the date and location scope; empty can be correct.
- Newer server data warning: synchronize, then generate a new report.
- Export failure: check internet access, current role, and the save destination.
- No diagnostic decision control: confirm the submission has synchronized and the current user is an owner or supervisor.
- Diagnostic cannot be submitted: confirm the ticket is assigned to the current technician and is in Work in progress, then complete every required field.
Never retry by creating a duplicate ticket, cost entry, or diagnostic submission.
Exported files contain operational records and leave Workdesk access controls. Share only with authorized recipients and destinations.